
This week my tiny princesses had their week long intensive at dance. Both girls danced for three and a half hours straight for four consecutive days. Normally this wouldn’t call for a packed dinner, but this summer it did. Tiny Princess A had dance from 2:00pm to 5:30pm and then had to go directly to her two hour cheer practice. I had to make sure my girl had fuel to accommodate the five and half hours of non stop activity. I also had to make sure said fuel was FAST. I love being able to provide mostly healthy “fast food” meals for my tiny humans in the form of Bento!
BUT….. Before we get to the Bentos…….
You know those deliciously, crunchy, cheesy snack crackers? I know you do. Our kids love them! Am I right? I know my kids do and I’m pretty guilty myself, of being able to eat at least half a box in one sitting. Well, what if I told you that you could make your own cheese crackers? In your own kitchen. Right at home. It’s true, you can! And what if I told you that this scrumptious, cheesy, knockoff-ey goodness could be made with just four simple ingredients? That’s right! Only four ingredients. We decided to kick it up a notch though and used FIVE! I know it, we're rebels! ;)

I found the recipe on pinterest sometime back. The pin took me to a great blog called Divas Can Cook. I seriously got lost in there before I finally decided to get to work on creating my own cheese crackers! We followed the Divas Can Cook recipe almost exactly with only a few minor changes. So, if you want to go with the recipe from Divas Can Cook click here….. If you would like to add our little changes keep reading.
Here’s what you need… Chances is are you already have everything on hand! I LOVE those kind of recipes. ♥ This is seriously so easy I have it memorized! Well, that and we have made them every day this week. ♥ (Remember, I’m a rebel. That’s why our version has 5 ingredients)
- 1 cup of shredded Colby Jack cheese (Any shredded cheese will work. Colby just seems to be the cheese that we ALWAYS have on hand)
- 4 tablespoons butter
- 1/4 teaspoon salt
- 3/4 cup flour
- 1 teaspoon red pepper Keep in mind that this last ingredient will add a good kick to your crackers. Depending on your tastes adding the pepper might be too spicy. My tiny princess LOVE spicy foods so this was a good thing for us.
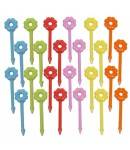
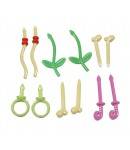
Okay, now that you have all the ingredients ready: Add every last one of them to a food processor. Don’t have a food processor? No worries! Do a quick google search on alternatives for a food processor and you will find a ton of great ideas, that I’m sure will work for this recipe. Process until a dough forms. I have to admit that my dough never really formed in the processor. It was more like crumbly little bits. I was VERY temped to add milk or water and you totally could, but upon a hands on inspection of my dough crumbles I realized that just a little hand squishing formed a dough ball quite nicely, so I changed my mind about adding liquid. Shape your dough into a disc, wrap with plastic wrap and refrigerate for one hour. Remove dough from fridge and let it soften. Preheat oven to 350 degrees F. Roll dough onto a smooth surface until you get your desired thickness. The recipe suggest 1/8 inch thick, but we chose to make our a bit thicker. This dough is seriously a breeze to work with! It is perfect for letting your tiny humans roll it out all on their own. It’s not sticky hardly at all so it eliminated the frustration that my little cooking buddy often has when working with a more sticky type dough. We chose not to go with your traditional square cheese cracker shape. Nope, I had my own custom cheese cracker cutter!

After you have cut your crackers how you wish place them on a foil lined baking sheet. Use a wooden skewer to add holes to the centers of your crackers. I’m pretty sure this step is unnecessary, but it sure is fun for the kids to do! ♥ Bake your crackers for approximately 12 minutes or until the bottoms are slightly golden brown. Remove from oven and let sit on hot pan for a couple minutes before adding to a cooling rack. Crackers can be stored in an air tight containers for a few days, but if your family is anything like mine they won’t even last that long! ;)
Some of my other Bento blog friends have made homemade cheese crackers too…..
Check out THIS awesome post from Jenn of Bento For Kidlet. She uses her Funbites Cube It cutter to create the perfect square shapes with ease! *keep in mind that this is an older post so the Funbites giveaway is no longer active.*
Melissa from another lunch creates puzzle shaped crackers in THIS blog post. How fun!
Momables has a great cheese cracker recipe HERE and really gets you wondering about why you need all those extra ingredients in store bought crackers anyway! While you’re there be sure to check out the subscription lunch packing meal plan! It’s AWESOME!
OMGosh! How perfect would THESE be for the upcoming Halloween season? Astrid of Lunches Fit For A Kid shows you how to make Candy Corn shaped crackers.

Now onto the meals. I’ll try to keep it short. ♥ (yeah right)
I decided to pull out our LunchBots for these meals. I was sort of in the mood for a “Tiny Lunch Box Challenge” I really LOVE trying to fit as much food as I can in a tiny lunch box! Want your own LunchBots container? Click the add over on my right sidebar to be taken directly to the LunchBots site!

In her LunchBots duo tiny princess A had: A leftover grilled BBQ chicken leg, a few cucumbers hidden underneath a bed of baby carrots, ranch for dipping in our small Laptop Lunches lidded container, green and red grape mix, and of course homemade cheese crackers!
Tiny princess K technically didn’t need a packed meal since she had plenty of time to eat at home, but she LOVES Bento, so who am I to deny her requests!

In her LunchBots trio K had: Carrots, cucumbers, cantaloupe, turkey meatballs, ranch for veggie dipping in the small Laptop Lunches lidded container, ketchup for meatball dipping in the green sauce cup, Trader Joe’s yogurt stars, and homemade cheese crackers.
Some things I used to make these meals

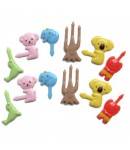

Doesn't the hole make it so there isn't a huge bubble inside the cracker? If you look at the flower compared to the animals, for example, the animals don't seem to have much for air pockets. The ones with just one hole do have air pockets but they are small. I always thought that was the purpose of the holes in saltines, too. One big air cracker would crumble the second you bite into it. I could be wrong.. just my thoughts.
ReplyDeleteWow! You know what, Sarah? You are probably right! I never really thought about it much when making our crackers, but your reasoning makes PERFECT sense!
DeleteI did a little google searching... You are EXACTLY right! :)
Delete:) Do you or your family taste a difference in the ones without the air pockets compared to the ones with them? Are they more dense tasting? I'll have to try to make my own sometime when I have some more energy.
DeleteThese look so good, and how fun to have the kids help with cutting shapes out! But, so many good recipes ... which to try... I am putting this on the agenda for sure!
ReplyDeleteThank you, Sarah! You are right there are soapy recipe options its hard to choose!
DeleteCute cute!! I love the different shapes :D
ReplyDeleteThanks, Jenn! I still adore your funbites crackers!!
Delete